
How to create a Stripe Account for Online Payment Processing

For our business and nonprofit customers, we mostly connect their website to a Stripe account for online payment processing. Below we list the steps to create a Stripe account and what to prepare before you start the process.
About Stripe
The two Irish developers, John and Patrick Collison, started Stripe 2010. They wanted to provide an easier way for developers to implement payment gateway system for apps and websites. Later on, Stripe partnered with Visa and other credit card companies and it now one of the most secure, payment systems with a strong focus on fraud prevention. It was also one of the first payment gateways besides PayPal that allows for recurring charges on customer credit cards. The combination of ease of integration and high security makes it the most popular payment gateway system.
Step 0: Have all information ready
- Who is the Admin person? Probably You.
- What’s her email address?
- What will be a good password?
- What’s your last four digits of Social Security Number
- What’s your bank’s routing number
- What’s your bank account number
Step 1: Enter the Registration Page on Stripe.com
Open your Internet Browser and go to https://dashboard.stripe.com/register
Step 2: Fill out the form to create an account
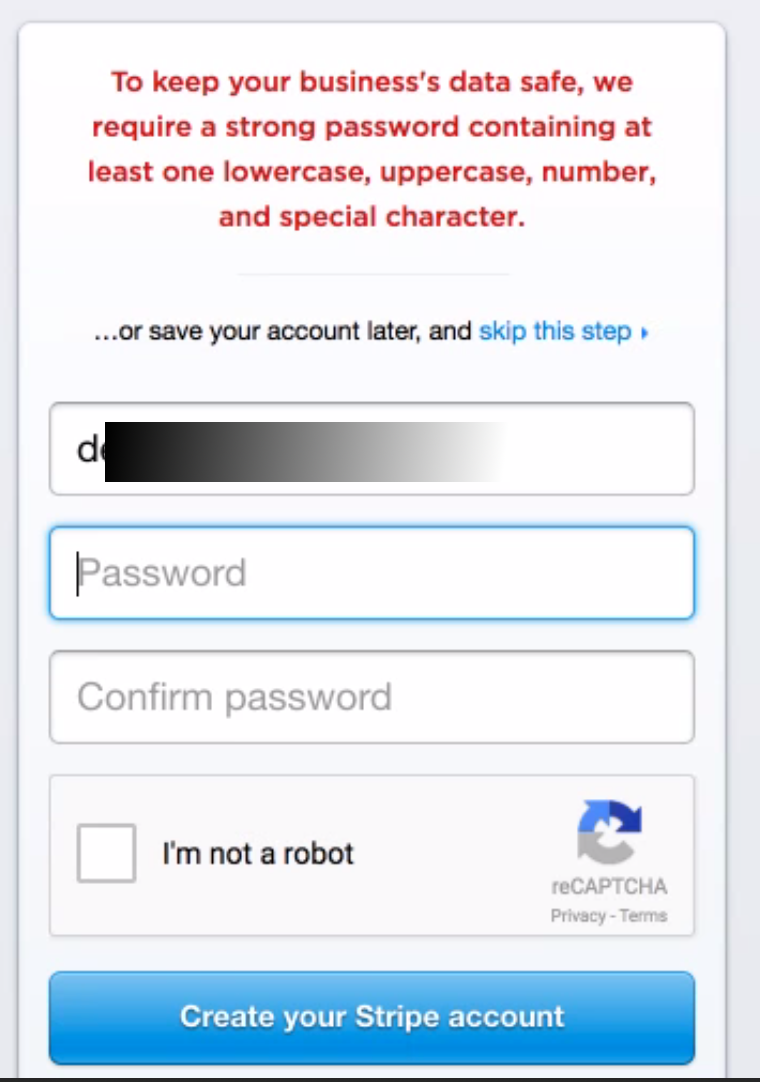
Notes: On this form all information is used for the admin user account. Make sure the email address is a specific email address and only the person dealing with company financials has access to it. It’s also the email address that will be contacted when you need to change your password. During normal business operation, this email address will receive notifications about payments and other important messages about your online account. When selecting a password, make sure it contains at least one lowercase, one uppercase, one number and one special character.
When you are ready,
- enter your email address,
- password,
- confirm the password,
- check next to “I am not a robot” and
- click on “Create your Stripe account”.
Step:3 Confirm you are the company representative
Stripe will need additional information from you to properly identify you. On this page, Stripe has some details on Identity verification
Optionally, you can use your Facebook account, your LinkedIn account or your Google Account and you have to fill in your personal identifying information
- Your personal legal name
- Your Date of Birth
- The last four digits of your Social Security Number
Step 4: Enter Bank Details
You would need to have available your Routing number and your Account number. Fill out the blanks and then click on “Activate Account”
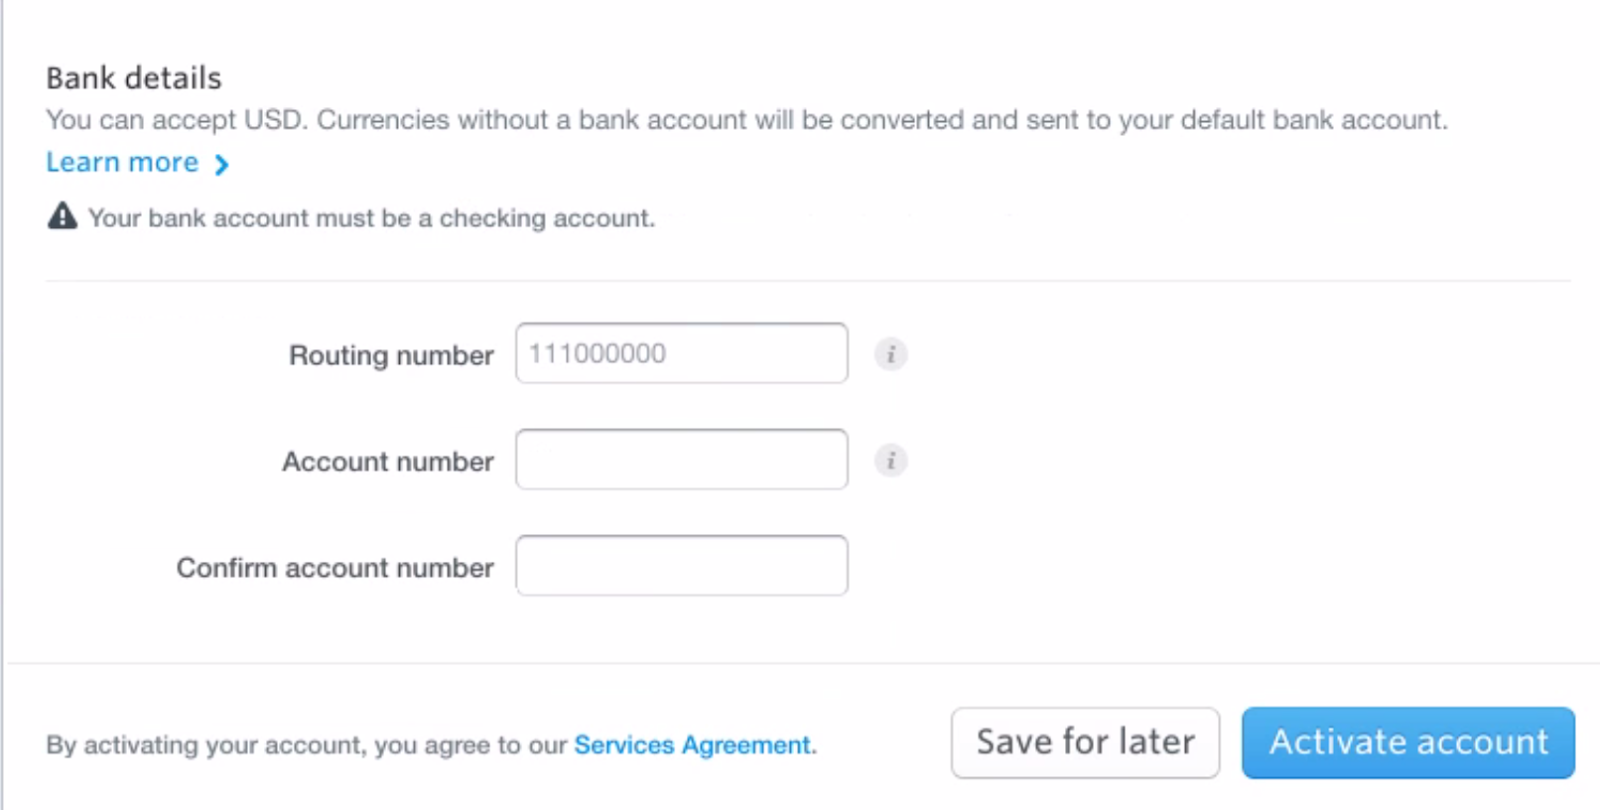
Once your Account Application Status is Approved you are able to take transactions.
Step 5: Get the Keys to connect Stripe to your Web Site
Go to https://dashboard.stripe.com/account/apikeys
Or via Dashbaord > Developers > API Keys
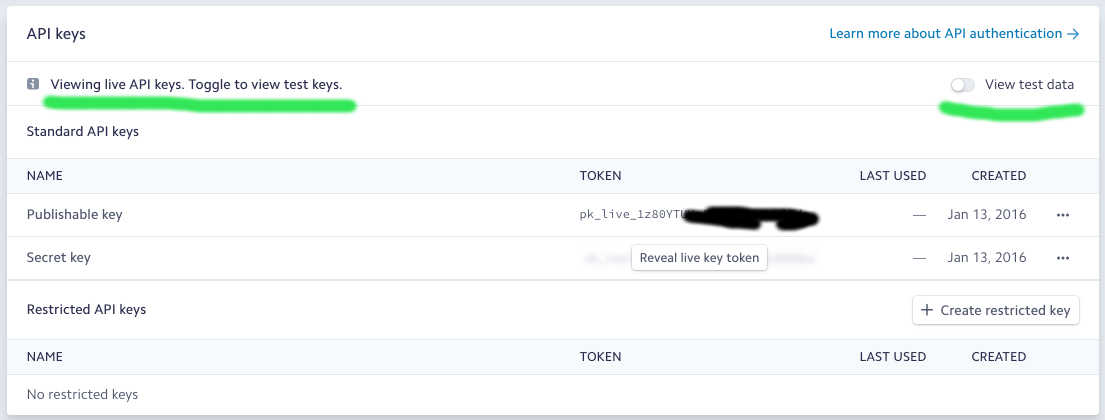
First you need to send to your web developer Test Keys so she can test that your website is connecting to the Stripe account.
Your webdeveloper needs the Publishable key and the Secret Key (you need to click on “Reveal test Key Token)
Important: Please copy/paste the keys, as it’s very hard to type them from a picture.
Video: How to get your API Keys:
Once the configuration and integration work, your web developer would need also the live keys. On top of the screen is a toggle slider that lets you switching from live to test and vice versa.
And then click on “Reveal live key token” to display the secret key and copy/paste that as well.
Step 6: Get the Webhooks
For the Contribution form to work the background communciation also need Webhooks.
Please Go to Dashboard > Developers > Webhooks
And add a Webhook: https://yoursite.com/?callback=gravityformsstripe
Video: How to add a webhook (GravityForm)
At that point your web developer needs to change your website to be on a secure socket layer and have HTTPS enabled on the server.
That should be all you need.
One Reply to “How to create a Stripe Account for Online Payment Processing”
Comments are closed.
[…] Next, you've got to install the available Stripe Add-On and hook it up to your Stripe Account. Need help with your Stripe account, here's a Stripe setup guide. […]